


 game icons banners and player identity.")
Getting really accurate results in your home workshop can seem tough. Whether you’re experienced or just starting out the key to perfect projects is how you set things up. That’s where the Vise comes in as a reliable tool to help you. But how do you make sure every project you work on with your vise turns out just right? Follow this guide to learn how to use a Vise Kurt effectively improving both accuracy and quality of your work.
Always Selecting the Right Kurt Holder
Your first step is to pick the right Kurt holder for your project. Also The Kurta Size and shape of what you’re working on will decide which holder is best. Smaller items might need a smaller vise while bigger or oddly shaped pieces might need something more adaptable. It’s important to choose the right holder to prevent any movement during work which could mess up your results.
Must Understanding the Kurt Vise?
What is a Vise Kurt? It’s a strong and dependable tool used to hold something steady while you work on it like during cutting or drilling. Its solid design and precision make the Kurt Vise Adapter Plate a must-have for jobs where you need things to be just right.
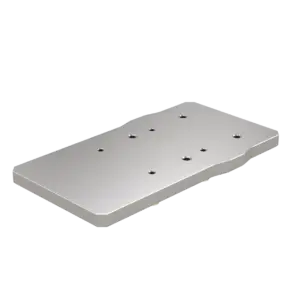
Setting Up the Kurt Adapter Plate
Next, set up the Kurt adapter plate. This plate connects your vise to the table of your machine making sure the vise is attached tightly and lines up right. It’s really important to line everything up correctly because even a small error can make your final product off.
Positioning Your Workpiece
With the adapter in place now put your item in the vise. This step is key to getting the accuracy you want. Make sure the item is tight against the vise jaws. Use flat bars or other tools to keep it level and prevent it from tilting or moving while you work.
Using a Vise Adapter for Enhanced Precision
If your project needs to be super precise, think about using a vise adapter. A Kurt Vise adapter can give you more stability and let you make tiny adjustments. These small changes can be really important for detailed projects. This extra control can help you get from a good result to a perfect one.
Checking for Alignment with Precision Instruments
After you’ve got everything set up it’s a good idea to double-check your work with precision instruments. Tools like dial indicators or calipers help you make sure everything is aligned perfectly before you start your machine. This might seem like an extra step but it can save you a lot of time fixing mistakes later. Always take a moment to measure and adjust as needed. This helps ensure that your final product is exactly as you planned.
Running a Test Piece
Before you commit to cutting your actual material, run a test piece. Use a scrap piece of material that’s similar to your project material. This step lets you see how the machine settings and your setup affect the outcome without risking your main project. It’s like a practice run that helps you make any necessary adjustments to get the best results. Sometimes what works in theory needs a little tweak in practice and that’s perfectly fine.
Continuous Learning and Improvement
Even with all the right steps there’s always room to learn and improve. Each project teaches you something new. Keep notes on what settings and techniques work best for different types of jobs. Also watch videos, read articles or join forums where others share their tips and tricks. Over time you’ll build up a wealth of knowledge that will make working with your Kurt Vise and other tools even more rewarding. Always be open to new ideas and methods to keep improving your skills.
Maintaining Your Vise Kurt With Optimal Performance
Keeping your Kurt Vise in good shape is important if you want it to work well for a long time. Check regularly for any signs of wear or damage like the jaws not lining up or the vise not holding as tightly. Put oil on the moving parts now and then to keep them moving smoothly and clean the vise after each use to stop dirt from building up.
Common Pitfalls to Avoid When Using a Kurt Vise
Even with the best tools you can still make mistakes. A common one is tightening the vise too much which can bend your item or break the vise. Another problem is not choosing the right jaw type for the material which can cause slipping or leave marks.
Conclusion
Getting really good at using a Kurt Vise is a great skill for anyone who makes things. By choosing the right tools, setting up carefully and taking good care of your equipment you can get excellent results that look professional. Remember doing a good job isn’t just about having the right tools but also about how you use them. So take your time, follow these steps and see your projects improve. Are you ready to take your skills to the next level with your next project?
By using these steps in your work you don’t just use a tool; you’re part of a tradition of making great things. The Vise isn’t just for holding pieces together—it’s for making projects that stand out because of their quality and accuracy.